- Blog
- 2026/08/18
If you're planning a raised vegetable bed, a fruit tree growing area, or a landscaped planting bed on a lawn, rooftop, or concrete surface, the first question usually isn't "what should I plant" — it's "how do I contain the soil?" A garden edging board (sometimes called a root barrier board or soil divider) is one of the most common solutions, and products on the market generally fall into two categories: traditional roll-type edging boards, and panel-assembled plastic edging boards like the planting ring. This article walks through the correct way to assemble and use a garden edging board, and compares the two material types, so you can choose the right approach for your site and crop.
What Is a Garden Edging Board, and How Is It Different from a Traditional Edging Board?
A garden edging board's job is to create a physical barrier around a growing area, separating the backfilled soil from the surrounding native soil or paving. This raises the root zone, concentrates water and nutrients, and helps prevent soil loss and weed intrusion. The traditional approach is usually a roll-type edging board: a full roll of plastic or rubber sheeting is cut to the needed length, bent into a ring shape, and secured with wooden stakes or wire.
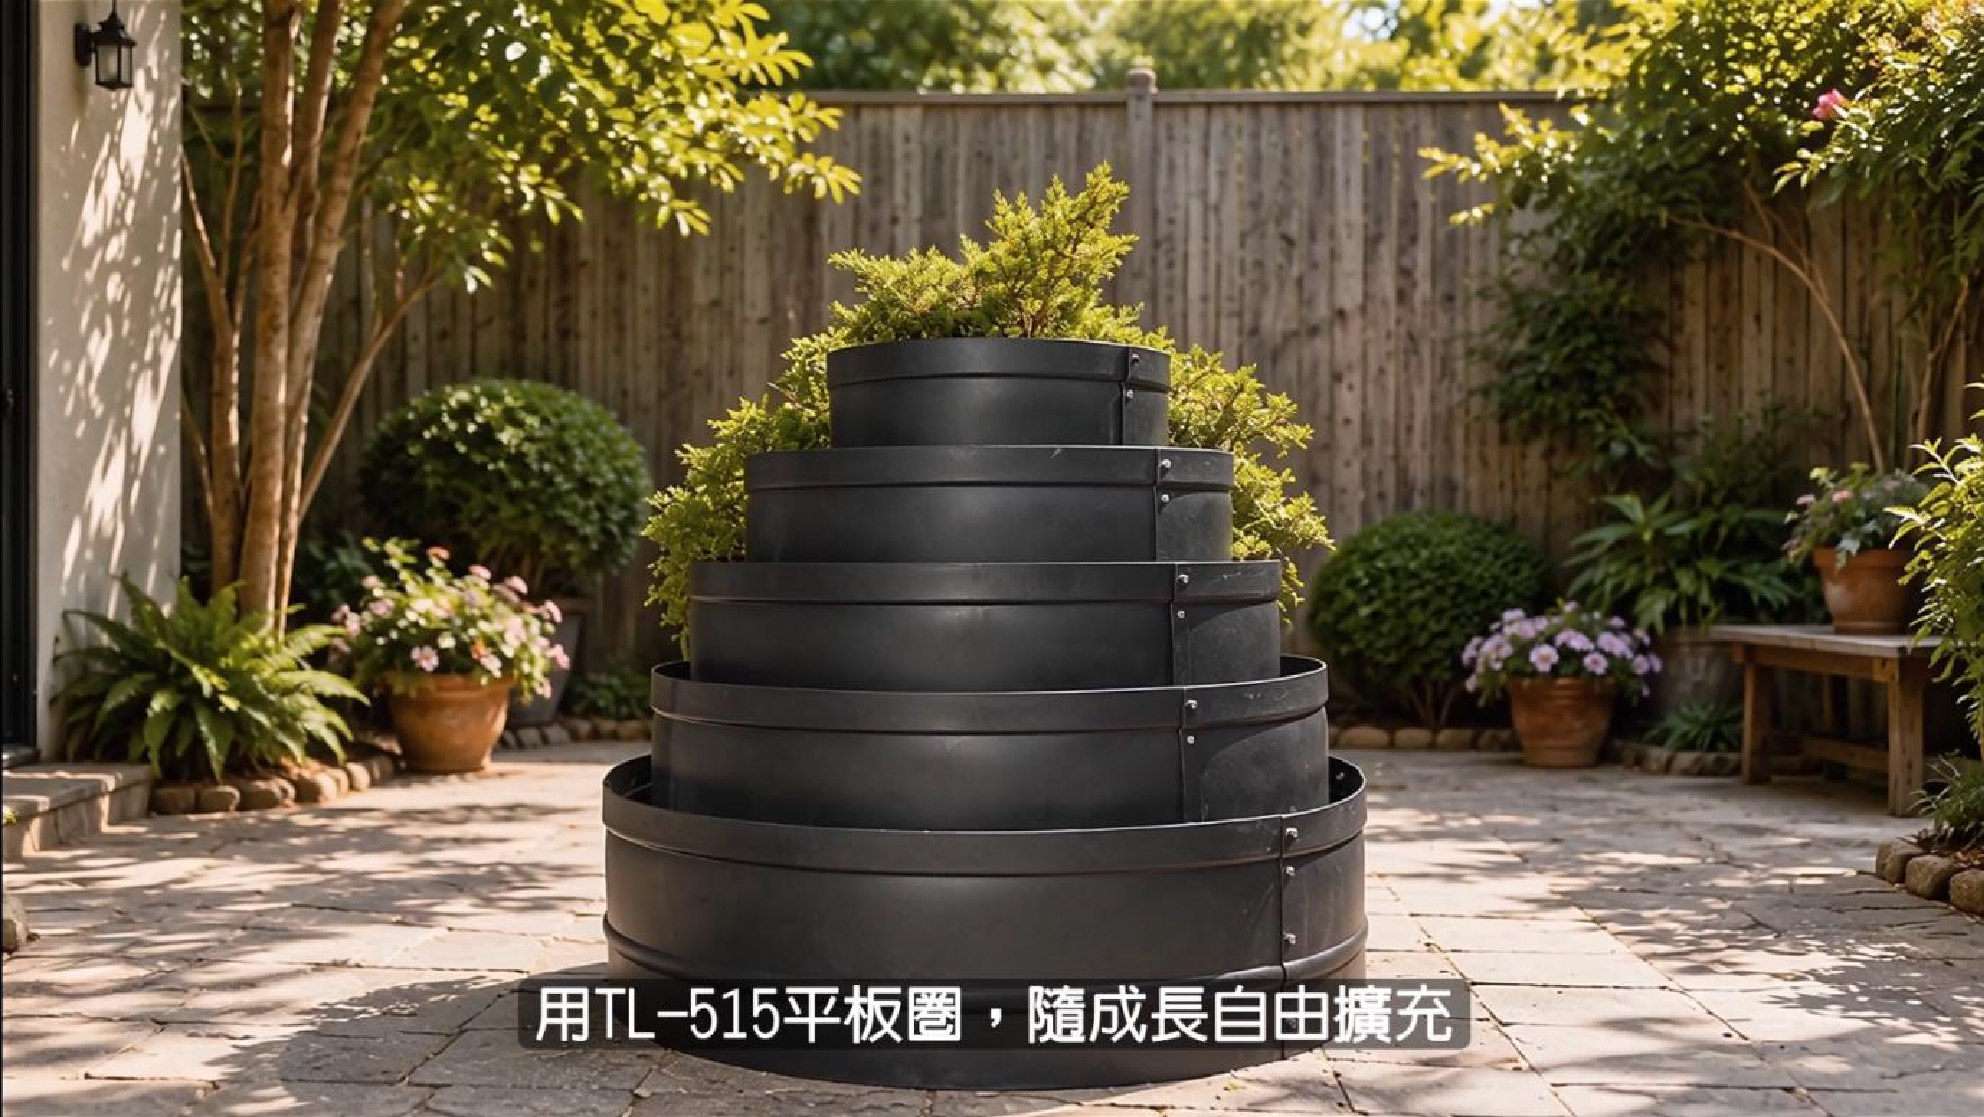
A planting ring is a different take on the garden edging board — a panel-based, modular design where you first choose the appropriate height, then decide on the circumference. Each panel is fastened to the next with stainless steel screws and nuts, with no need for extra stakes or wire. With just a screwdriver, you can assemble it into a circle, oval, or even an irregular bed shape that follows the contour of the site. For readers still weighing up which edging method to use, both approaches serve the same core function — the real differences come down to assembly method, shape flexibility, and ongoing maintenance, which the comparison table further down covers in more detail.
Site Assessment Before Assembly: Choosing the Right Height, Area, Terrain and Crop Fit
Before you order or start work, it's worth confirming four things in advance, so you don't end up with the wrong size after assembly.
- Growing height: Shallow-rooted vegetables and herbs generally need around 15–20 cm. For root vegetables, young fruit trees, or areas needing soil amendment, 30 cm or more is recommended.
- Growing area: Estimate based on the plant's expected growth over the next 2–3 years, so you avoid starting with too small an area and having to disassemble and rebuild later.
- Terrain and drainage direction: Check whether the growing area sits in a low point of the overall terrain — poor drainage can lead to standing water long-term, even with a raised bed.
- Crop root type: Fibrous-rooted plants (most vegetables) need less panel height, while taprooted or woody plants (fruit trees, timber trees) require a deeper soil layer and a taller, more stable structure.
Proper Assembly Process: Leveling, Layout, Assembly, Alignment and Backfilling
1. Site Leveling and Layout
Clear weeds, gravel, and any sharp debris from the growing area, and confirm the ground is roughly level — for natural soil, keep any elevation difference within about 3 cm. Then mark out the planned boundary with rope or chalk, so it's easy to line up the panels during assembly.
2. Assembly and Fastening
Following your marked layout, fasten the planting ring panels along the boundary one by one using hex screws and nuts — no extra cutting required. The TL-510 (30 cm height) can be assembled by one person; for the TL-515 (45 cm height), we recommend working in pairs — one person holding the completed section steady while the other continues connecting panels, to avoid the ring leaning from uneven pressure on one side.
3. Structural Alignment Check
Once the full ring is assembled, walk around it and check for loose connections, panels that aren't vertical, or inconsistent height. Confirm every lock point is secured before moving on to backfilling.
4. Layered Backfilling
We recommend backfilling in 2–3 layers, lightly compacting each layer before adding the next — filling all at once can leave the soil hollow underneath and cause it to settle later. As a general rule, fill to about 3–5 cm below the top edge, leaving buffer room for irrigation.
[Please provide image URL and ALT text]
Key Techniques for Raised-Bed Growing: Soil Mix Ratio, Drainage Design and Water/Fertilizer Management
When growing in a raised planting ring, soil condition matters even more than it does at ground level, since the plant's root activity is concentrated almost entirely within the backfilled layer inside the ring.
- Soil mix ratio: A general recommendation is to blend growing medium, organic matter (such as compost or coconut coir), and a drainage component (perlite or coarse sand) in proportion, balancing water retention with aeration.
- Drainage layer design: If the ring sits on concrete or a waterproof membrane, add a 3–5 cm drainage layer at the very bottom (such as expanded clay pellets or gravel) to prevent the roots from sitting in water long-term.
- Water and fertilizer management: Because the soil layer in a raised bed is relatively self-contained, moisture evaporates faster than it would at ground level, so watering frequency usually needs a slight increase. For fertilizing, smaller, more frequent applications are recommended — heavy, infrequent feeding after nutrients deplete quickly can lead to root burn.
|
Step |
Correct Procedure |
What to Check |
|
Step 1: Mark the layout |
Mark out the planting ring's position, surrounding walkways, and irrigation routing on the ground according to your plan. |
Whether space is reserved for watering, pruning, harvesting, and moving materials. |
|
Step 2: Level the base |
Clear any bumps and level the base; loosen natural soil as needed, and check the drainage slope first on hard surfaces. |
Whether the ring's base sits stable and flush, without noticeable wobble. |
|
Step 3: Sort and lay out the panels |
Based on your chosen size, lay out the panels and factory-supplied connectors flat, and confirm the quantity and assembly orientation. |
Avoiding discovering missing pieces, wrong specs, or reversed orientation only after backfilling. |
|
Step 4: Complete the connections per the manufacturer's method |
Starting from one connection point, assemble panels in sequence so each panel and connector is fully seated. |
Whether any joint is loose, misaligned, unlatched, or shows a visible gap. |
|
Step 5: Align the ring and top edge height |
Once roughly formed, check that the shape is even; use a level tool to confirm top-edge height if needed. |
Consistent top-edge height, which helps with even backfill depth and irrigation. |
|
Step 6: Backfill the growing medium in layers |
Add a small amount of soil first to confirm the ring is stable, then backfill and level the growing medium in layers, section by section. |
Avoid dumping a large amount of wet, heavy soil onto one side all at once. |
|
Step 7: Set up irrigation and mulch |
Once backfilling is complete, arrange irrigation, mulch, and plants, while leaving room to inspect the joints and drainage. |
After the first watering, check for settling, overflow, or poor drainage. |
Application Scenarios: Fruit Trees, Commercial Timber, Gardens and Rooftop Concrete Surfaces
Garden edging boards have a wide range of applications — here are a few common scenarios and key points to keep in mind for each.
- Fruit trees and commercial timber: Root development needs a deeper soil layer, so a taller assembly height is recommended, along with confirmed bottom drainage, to avoid root-zone waterlogging over long-term growth.
- Garden and landscape design: The planting ring's panel-based design is well suited to circular flower beds or irregular bed shapes, meeting the design flexibility landscaping often calls for.
- Rooftop or concrete-surface growing: Since the ground itself is non-permeable, planning for a drainage layer and bottom drainage holes matters even more, and it's worth assessing structural load capacity to avoid the combined weight of soil and water exceeding the floor's limit.
|
Application Scenario |
Usage Recommendation |
Management Focus |
|
Home garden bed / kitchen garden |
Plan a size that's easy to tend, leaving room for walkways and irrigation. |
Pay attention to sunlight, harvest access, and summer watering needs. |
|
Concrete surface / rooftop mini farm |
Confirm the floor's load capacity and drainage first, then assemble the planting ring and backfill with soil. |
Keep drainage outlets clear; avoid long-term standing water and overloading. |
|
Fruit tree cultivation |
Plan a larger growing area based on root spread and plant spacing, avoiding overcrowding. |
Pair with staking, pruning, irrigation, and regular root-zone checks. |
|
Commercial timber / nursery |
Use a consistent size to build repeatable growing units, which simplifies management and future transplant planning. |
Track species, growing medium, growth period, and transplant process to build up practical experience. |
|
Landscape design |
Use the planting ring as a tool for planting zones and height variation, paired with mulch or surrounding pathways. |
Evaluate overall visual effect, drainage, and maintenance access. |
[Please provide image URL and ALT text]
Planting Ring vs. Traditional Roll-Type Edging Board: Which Should You Choose?
Both options achieve the basic goals of soil containment and raised-bed growing. Here are a few angles to consider when choosing between them:
|
Comparison |
Planting Ring (Modular Plastic Panels) |
Traditional Edging Board (Roll-Type) |
|
Assembly method |
Panels fastened with stainless steel screws, no extra wire needed, panel count adjustable to fit the site's contour |
Cut from a full roll and bent into shape, reinforced with wooden stakes or wire |
|
Shape flexibility |
Can be assembled into circles, ovals, or irregular bed shapes |
Mostly straight lines or gentle curves; tight corners take more effort |
|
Height adjustment |
Height options from 30 cm (about 1 ft) to 90 cm (about 3 ft) |
Height is fixed by the roll material itself; increasing height means replacing the whole roll |
|
Disassembly and storage |
Can be taken apart panel by panel, washed, and stacked for storage — convenient for crop rotation or relocation |
Difficult to store flat once removed; repeated bending tends to leave creases |
|
Weather resistance and lifespan |
UV- and moisture-resistant, holds up well against embrittlement in long-term outdoor use |
Varies by material thickness; more prone to becoming brittle and cracking under prolonged sun exposure |
|
Best suited for |
Rooftops, concrete surfaces, landscape design, and growing areas that call for a refined bed shape |
Large, simple terrain and budget-driven, temporary edging |
In short: if assembly convenience, shape flexibility, or the possibility of future disassembly, relocation, or seasonal storage matter to you, a panel-assembled plastic edging board like the planting ring is likely the better fit.
Common Mistakes and Things to Watch For
- Assembling directly on unlevel ground: Over time, this tends to cause localized leaning or gaps where soil can escape.
- Skipping drainage planning entirely: This is especially risky on concrete or waterproof membrane surfaces — a missing drainage layer is the most common cause of waterlogged roots.
- Overfilling with soil: Water and soil spill straight over the top when watering, which actually reduces water retention and can make a mess of nearby walkways.
- Mistaking the edging board for a walkway: The board is a soil-containment structure, not a load-bearing surface — stepping on it repeatedly can loosen the joints or deform the panels.
- Ignoring the crop's root type: Using a panel height suited to shallow-rooted crops for fruit trees or timber trees will restrict root development and affect long-term growth.
Why Garden Edging Boards Made by Aiermei Are Worth Trusting
Aiermei has built up years of experience in horticultural and plastic injection manufacturing, with a mature quality-control process spanning mold design, material selection, and finished-product testing. Our products' UV resistance, moisture resistance, and overall weatherability for long-term outdoor use have also been validated against real local climate conditions over time. Compared with lower-cost products of unclear origin, Taiwan-manufactured garden edging boards tend to offer more consistent material specifications and dimensional tolerances — which matters even more for panel-based products that require precise fit, like the planting ring. If tolerances aren't consistent, joints can loosen or fit poorly, directly affecting the structural stability and service life of the assembled ring.
[Please provide image URL and ALT text]
FAQ
Q1. Do I need to level the ground before installing a garden planting ring?
Yes, we recommend leveling the site first. If the ground has significant unevenness, gaps can form between panels, letting soil and water escape and causing the structure to lean over time. On concrete or hard paving, you can usually skip digging — just clear away large stones and confirm the surface is roughly level before assembly.
Q2. Does a planting ring need extra drainage holes?
In most growing situations, it's best to leave a drainage path at the bottom, especially when the ring sits on concrete or a waterproof membrane. On natural soil, which already drains to some degree, you can decide whether to add side drainage holes based on how much water tends to pool. For long-term container-style growing — such as on a rooftop or balcony — a proper drainage layer is strongly recommended to keep roots from sitting in water.
Q3. Can I fill the ring with soil all the way to the top in one go?
We don't recommend it. Overfilling causes water to spill straight over the top when you water or when it rains, which actually reduces water retention and can wash soil onto nearby walkways. As a general rule, fill to about 3–5 cm below the top edge to leave buffer room for irrigation.
Q4. Can I plant deep-rooted fruit trees or timber trees directly in a planting ring?
Yes, but you'll need to size the height and diameter to match the tree's expected root development, and make sure the soil beneath the ring itself has good drainage and aeration — the backfilled soil inside the ring can't do all the work on its own. For commercial timber or fruit trees, a taller assembly height is usually recommended, along with careful water and fertilizer management early on to give the roots room to spread.
Q5. Can the planting ring be disassembled and stored when not in use?
Yes — this is one of the biggest differences between a planting ring and a traditional roll-type edging board. Because it's a panel-based structure, you can take it apart panel by panel, wash it, let it dry, and stack it flat without taking up much storage space, making it easy to reuse for seasonal crop rotation or reconfiguring your growing area.
Q6. How can I inquire about bulk orders for commercial growing operations or landscaping projects?
We offer bulk-order sizing services planned around your crop, site, and growing area, suited to nurseries, landscaping contractors, farms, and distributors. Feel free to reach out through our website contact form, by phone, or via our official LINE customer service with details of your intended use and quantity needed, and we'll help you work out the right size and supply arrangement.